Understanding Common AC Problems and Fixes

Many people don’t think they need AC Repair, but getting maintenance can keep your system working properly for years to come. It can also help prevent costly repairs and replacements down the road.

hvac

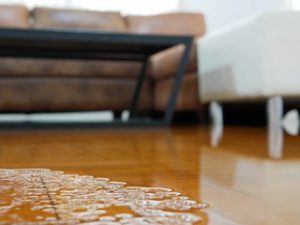
A breaker that keeps tripping can indicate a problem with the circuit or electrical wiring, while leaking water around your unit could mean a clogged condensate drain line or improper unit sizing. Contact AC Repair Round Rock for professional help.

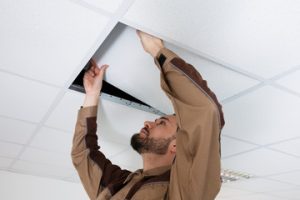
During normal use, mechanical wear and tear can happen to AC parts. This is why it’s important to keep up with routine maintenance from an experienced HVAC professional, which may include inspection of the ductwork, lubrication of moving parts, topping off low refrigerant, and checking for electrical problems.

If your AC repair technician finds mechanical problems, they can take care of them to return your system to full functionality. This might include replacing worn belts, cleaning the condensate drain line, and adjusting the blower motor speed. The best AC technicians will also check electrical components like the contactor and capacitors, as they are responsible for 80 percent of all AC repair calls.

These electrical parts are susceptible to damage from overuse, so they’ll likely need to be replaced at least once during your air conditioner’s lifespan. They are especially sensitive to heat, so it’s important to schedule an AC repair immediately when you notice any signs of a capacitor problem.

Another sign of a worn-out capacitor is short cycling, which is when the unit turns on and off frequently. This is a result of overworking the compressor and can be caused by a number of things, including dirty coils, thermostat issues, and an oversized unit. Our team can quickly identify the source of the problem and provide an AC repair, helping you save energy and money.

An AC repair technician can also help you save money by addressing inefficient cooling. Poorly insulated ductwork, dirty coils, and other factors can force your system to work harder than necessary, leading to high energy bills. Fortunately, these problems are usually easy to fix with AC repairs and can cut your energy bill by up to 20-40% a year.

While determining whether to repair or replace your AC system is a personal decision, most homeowners will find that repairs are a good option if the repair costs are less than a third of the cost of a new system. In addition, repairing your current system can extend its life by many years. However, if you’re having to repair your system often, it might make more sense to invest in a new one with higher efficiency and a long lifespan.

Refrigerant Leaks

Refrigerant leaks are a serious AC repair issue, and they’re also dangerous. Refrigerant is used to absorb heat and remove it from the air, so without it your system won’t cool the home effectively. You might notice an unexplained spike in your utility bills when this problem occurs, since the system will have to work overtime to compensate for low refrigerant levels.

A leaking refrigerant can cause your system to suffer from severe damage, and it may be more cost-effective in the long run to replace the unit entirely. Depending on the size of the leak and its location, professionals use various techniques to seal and repair them, including epoxy, resin-based sealants, or mechanical fittings.

Leaks often happen in the evaporator coil or in the lines that transport refrigerant throughout the system. These are areas that can be prone to corrosion or wear and tear, as well as temperature changes and vibrations. Eventually, these problems will lead to leaks, which usually begin as pinhole-sized holes.

Another common sign of a refrigerant leak is the smell of chemicals or burning. This is because a lack of refrigerant forces the evaporator coil to work overtime, which can burn out or degrade the coil and create an unpleasant burning odor.

If you suspect a refrigerant leak, contact an AC repair specialist right away. They’ll use soap bubble tests or other methods to determine the extent of the leak and repair it.

In some cases, a professional may recommend using a refrigerant sealant as a stopgap measure. However, this can end up doing more harm than good, as sealants are not always effective and can block the system from working correctly.

A leaking refrigerant is more likely to occur in older air conditioning units, as the lines that transport this chemical can wear out and develop cracks over time. They can also be damaged by physical damage, such as rocks, branches, or debris thrown into the unit by a storm or punctured by lawn mowers and other outdoor equipment. Leaks can also be caused by manufacturing defects or poor installation.

Thermostat Issues

When your thermostat isn’t working, your cooling system doesn’t get the signals it needs to run. This can lead to an ineffective AC and high energy bills. This type of AC problem is often the result of a thermostat malfunction or improper installation.

When you adjust the temperature on your thermostat, it should immediately react and send signals to your air conditioner to start running. If you notice that your thermostat isn’t responding, you may need to replace its batteries or check the breaker box for a tripped one. If this doesn’t solve the issue, call a professional to inspect your air conditioning unit and make repairs if needed.

Another common thermostat issue is when the indoor temperatures don’t match the reading on the thermostat. This can be caused by a number of issues, such as dirty air filters, uneven insulation or untight ductwork. It can also be a sign of an electrical problem in your home, including faulty wiring or a blown fuse.

If you can’t find the source of your problem, try cleaning out your vents to remove any blockades that are hindering airflow. Toys, drapes and other items can get into the path of return and supply vents, leading to airflow restrictions and reduced efficiency. Similarly, foliage can get inside the outdoor unit or around the thermostat, causing it to malfunction.

It’s important to set expectations with your HVAC service provider about how long it will take to address minor problems in your cooling system. This will help both parties to avoid any unnecessary frustration and keep the repair process moving smoothly. Effective communication is a vital part of this process, which should extend after the repair is complete as well. This is an opportunity for you to ask your HVAC service provider any questions you have and to ensure that you understand what’s been fixed and why it needed to be done. This will empower you to prevent similar problems from occurring in the future, which can increase your home comfort and reduce your utility bills.

Electrical Issues

Electricians and HVAC technicians are trained to spot and address AC electrical issues. If left unchecked, these problems can lead to system shutdowns or even major damage. It is important to catch early warning signs like tripped breakers, frequent shutdowns and faulty wiring.

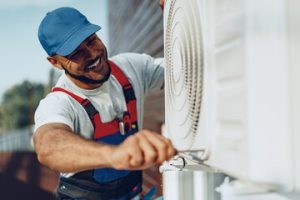
AC electrical problems are more common during summer, when temperatures rise and the system works harder. This puts a greater strain on components, especially older systems or those without regular maintenance. The best way to prevent these issues is to ensure you get regular inspections and routine maintenance from a professional.

Thermostat Issues

One of the most common AC electrical problems is a malfunctioning thermostat, which can be caused by dead batteries, incorrect settings or faulty sensors. It is a good idea to check the thermostat regularly and replace the batteries as needed. If the problem persists, it may be time to call in a professional for a more in-depth look at the thermostat and its connections.

Circuit Breaker Problems

A tripped circuit breaker can be a sign of serious electrical issues, including a bad capacitor or an overloaded compressor. If you notice your breaker keeps tripping, it is best to turn it off and leave it off for half an hour before turning it back on. This will give the system a chance to reset itself and will allow you to determine whether the problem is with your breaker or a more serious electrical issue.

You should also check the outside unit to see if there is a clog in the condensate drain line. A clog can cause your system to overheat and shut down, so it is essential to clear the line as soon as you notice it is clogged. A clogged condensate drain line can also make your AC work harder, leading to reduced airflow and efficiency. This is best done by a professional, as they have specialized tools and can clean the line thoroughly to prevent future clogs. You should never attempt to repair a clogged line yourself, as this can be dangerous and cause further damage.

Cabinet Refinishing and Cabinet Painting

Cabinet Refinishing San Jose CA is an effective way to refresh your kitchen cabinets. However, it only works if the cabinet boxes are structurally sound and in good condition. Harsh chemicals or abrasive cleaning products can damage the finish, causing it to chip and scratch more easily.

Cabinet Refinishing

Refinishing is an eco-conscious option since it eliminates the need for new materials and avoids adding to landfill waste. It also cuts down on dust and mess in your home.

Cabinet refinishing is a great option for homeowners who want to refresh their kitchen cabinets without the cost and hassle of replacing them. This process involves sanding or chemically stripping the existing finish and applying a new stain or paint. This can dramatically transform your kitchen while saving you time and money. Cabinet refinishing is suitable for wood and some engineered materials like medium-density fiberboard (MDF). It can also be used to touch-up or repair minor surface damage.

The first step of a cabinet refinishing project is to thoroughly clean the cabinets, removing any dirt, grease or grime. Then, the surfaces are sanded to smooth them and create an even base for the new finish. This is an important step because it ensures a smooth and even result that will last for years to come. Next, the cabinets are primed to ensure that the new finish will adhere well. Once the primer is dry, it’s time to apply the final coats of stain or paint.

This process can be done by yourself, but a professional can provide you with a much better and more consistent result. In addition, professionals have the experience and expertise to get the job done quickly and efficiently. They can also help you select the right colors and finishes that will complement your home’s style.

There are many benefits to choosing cabinet refinishing over replacement, but the most significant is the cost savings. Refinishing is significantly cheaper than refacing, which is more extensive and involves replacing the doors, hardware and hinges.

Another benefit of refinishing is that it’s a more environmentally-friendly option. Reusing the existing cabinets reduces waste and eliminates the need for additional manufacturing. It also minimizes the amount of dust and mess that is generated during the renovation process, which can affect other areas of your home.

A cabinet refinishing project can be completed in much less time than a refacing or replacement project. This means that you’ll be able to enjoy your newly renovated kitchen sooner. Furthermore, it’s a safer alternative to tearing out the old cabinets, which can lead to structural damage.

Painting

Cabinet painting can give your kitchen a fresh new look without the expense of replacing or refacing cabinets. It can also help conceal stains or scratches on wood cabinets. In this process, your cabinets will be cleaned to remove grease and dirt, sanded to prepare for paint, and then painted with your choice of color. The surface is then sealed to protect the cabinets from wear and tear.

Before you can begin the painting process, it is important to mask and cover anything that you do not want to get paint on. This will prevent any accidental spills or drips that could ruin your final result. It is also a good idea to remove the cabinet hardware, such as knobs and handles, and place them in an easily accessible location. This will make it easier to clean and reinstall the cabinet hardware later.

The next step is to lightly sand the surfaces of your cabinet doors and drawer fronts. This will help the primer and paint adhere to the surfaces. Be sure to use a fine grit sandpaper and sanding block. Once the sanding is complete, wipe down the cabinet doors and drawers to remove any dust or residue left from the sanding process.

Once your cabinets are prepared for the paint, NHance will apply one coat of stain blocking or premium European primer. Then, we will hand-apply multiple coats of paint to the wooden surfaces of your cabinetry. This will give your cabinets a beautiful, rich color.

We recommend Fusion Mineral Paint Ultra Guard for your cabinetry because it dries transparent, enhancing natural wood grain and highlighting light or dark colors. It is also a durable and low-VOC finish, making it safe for your family and the environment.

Professional cabinet painters can save you time and effort by meticulously prepping your cabinets for a flawless paint job. They will use a cleaning solution designed for cabinets and work to remove dirt, grime, grease build-up, and other contaminants. They will also sand the surfaces to ensure an even finish. In addition, a professional will choose the right paint for your cabinets to achieve the exact look you desire and will use sprayers and brushes specifically designed for cabinetry to deliver a smooth, uniform finish.

Staining

Staining is the process of applying pigment to a surface, such as wood, to alter its color and highlight its natural grain pattern. It is a highly effective way to revive old cabinetry and create a new look that is both classic and contemporary. There are many different staining options available, including oil-based stains, water-based stains, and gel stains, each with its own specific coloration, drying time, and application method.

Choosing the right stain for your cabinets is critical to their appearance and durability. A quality finish will protect the wood from daily wear and tear, moisture exposure, and heat and cold, while also enhancing its beauty.

Refinishing is a great option for those who want to refresh their kitchen without the cost and inconvenience of a complete remodel. It is a more labor-intensive process than painting, as it involves stripping the existing finish and sanding to prep the surfaces for the new coating. However, the result is a high-quality, durable finish that can endure decades of use.

While it is possible to perform refinishing on your own, it is best left to professionals to ensure the proper preparation and application of the stain, as well as to prevent any damage or discoloration. This can also help to minimize the amount of dust and mess in your home, as well as reduce the exposure to paint odors and extended downtime.

A major benefit of refinishing is that it preserves the original structure of your cabinets, which can be beneficial for homeowners who have existing structural integrity and value. Additionally, refinishing is a more environmentally friendly option than replacement, as it reduces waste and resource consumption by reusing existing materials.

Unlike refacing, which can take weeks or months to complete and can cause significant disruption to your home, cabinet refinishing is a much quicker process. It can be completed in a matter of days, meaning that you can enjoy your refreshed kitchen sooner and avoid the stress and disruption of a full renovation.

Cleaning

Refinishing cabinets can completely transform the look of a kitchen for a fraction of the cost of replacing them. However, it’s important to follow the correct steps to get a smooth and professional finish. First, all surfaces should be thoroughly cleaned using a degreaser like Tri-sodium phosphate (TSP) to remove dirt and grease buildup. This helps the primer and paint to adhere.

Next, sand the surface of the cabinet to smooth it. This step is especially crucial for older cabinets where the finish has chipped or worn away. It’s also a good idea to use a tack cloth to remove any remaining wood dust after sanding, particularly in nooks and crannies where it can collect.

Once the cabinets have been sanded, it’s time to apply a primer. This will help the new paint or stain adhere and prevent stains from showing up later on. If you’re going to be painting the cabinets, it’s a good idea to select an oil-based primer. They dry much faster than water-based ones and emit less fumes.

Before you begin to paint, it’s a good idea to mask off any areas you don’t want painted or cover them with plastic or paper. This will keep the finished product from getting on countertops, appliances and floors. It’s also important to place a drop cloth under any cabinets where you’ll be working so you don’t end up with paint splatter on the floor.

Finally, it’s a good idea to label or number the cabinet doors and drawers so you can put them back together later on. This will make the process much easier and ensure that all the pieces match up correctly.

It’s also a good idea to clean all of the cabinet hardware before beginning to paint or stain. While there are many products on the market for cleaning cabinets, it’s important to avoid using harsh chemicals that can strip or discolor the finish. Instead, use a mixture of warm water and dish soap.

Ceiling Repairs You Shouldn’t Do Yourself

Ceilings inevitably experience a certain amount of wear and tear, and recognizing early signs of damage allows for timely intervention and reduces repair costs. These problems can range from minor hairline cracks to sagging sections that need to be restored or replaced.

Ceiling Repairs

Leaks and plaster damage are common concerns that often result in structural issues like weakened wood joists. Regular inspections and adequate ventilation help mitigate these problems. Contact Ceiling Repairs Perth for professional help.

Water damage to ceilings often goes unnoticed, but it can cause serious issues for the structure of your home. Unsightly stains and discoloration are the most obvious symptoms, but they can also lead to mold growth, structural deterioration, and even a collapsed ceiling.

When you suspect water leaks, it’s important to act fast. A water damage restoration company can identify the source of the problem and repair it before the issue gets worse. The first step is to contain the leak by putting buckets or towels underneath the damaged area. You can also punch a hole at the source of the leak and patch it up with roofing cement or plumbing tape.

Once the water is contained, you can begin repairing the ceiling. It’s important to dry out the affected areas to prevent any more damage, and you should remove any areas of drywall that are too damaged to be repaired. After removing the damaged sections of the ceiling, you can use sandpaper to smoothen any ridges and bumps on the surface before you begin patching.

If the water damage is extensive, you may need to replace the entire section of your ceiling. A professional can help you determine the extent of the damage and provide you with an estimate for the cost of repairs. It’s important to get your ceiling fixed quickly to prevent further damage to the rest of your home. Unseen water stains and leaks can eventually lead to wood rot, mold growth, and collapsed walls and floors. The longer you wait to fix your ceiling, the more expensive it will be to restore and the more likely it is that you’ll need to replace other parts of your home.

Structural Issues

Various factors contribute to ceiling damage, and understanding these causes helps you implement effective repair solutions. Whether your ceiling is made of plaster, drywall, or another material, each type has unique challenges and repair methods.

For example, drywall cracks usually require cleanup, patching with joint compound, and sanding to blend the repaired area with the surrounding surface. You may also need to repaint if the repair is significant.

In some cases, large cracks in the ceiling can lead to sagging or structural issues. In such cases, it’s important to identify the underlying cause and consult a professional to determine the best course of action.

Moisture and humidity levels are a common factor in ceiling deterioration. High moisture can result in mold growth, rot, or other issues that necessitate the removal and replacement of affected materials. In addition to addressing the root cause of the problem, implementing proper ventilation is a good way to reduce moisture levels and maintain a healthy and functional home environment.

Structural issues can arise due to several factors, including foundation settlement and improper construction. This type of damage can compromise the integrity of the entire structure if left unaddressed. To resolve such issues, a qualified contractor or handyman should examine the damaged area and implement structural reinforcements or repairs as necessary.

Plaster damage typically manifests as crumbling or peeling plaster, and can be caused by water infiltration, material aging, or other conditions. In many cases, this type of damage can be corrected using spackling or joint compound.

Changes in ceiling texture can be caused by water damage, poor application of drywall or plaster, or a changing aesthetic. Replicating the original texture requires careful patching with the appropriate compound, sanding, and then applying aerosol or roller textures to blend the patch with the surrounding surface.

Popcorn Ceilings

Popcorn ceilings (also known as stucco or cottage cheese ceilings) were a popular feature of many homes built in the 20th century. They were made of a material mix that contained asbestos to help bolster durability and fire resistance, but now that the dangers of asbestos have become widely known, this ceiling material can pose significant health risks. Inhaling asbestos fibers can lead to serious respiratory issues including mesothelioma, so any textured ceiling with cracks or discoloration should be repaired immediately.

Popcorn texture also makes it difficult to clean and repaint. The rough surface traps dust, cobwebs, smoke particles and other debris that can be difficult to remove. Over time, these surfaces can also become dull and discolored from embedded dirt. Attempting to touch-up or repaint a textured ceiling can also be very time consuming and challenging due to the difficulty in obtaining an even coat.

Cracks or flakes on your ceiling are another sign that it’s time to have your ceiling repairs done, as these problems can lead to moisture damage and mildew growth. The presence of mold and mildew can also be an indication that there are serious structural issues with your home, so these issues should be addressed as soon as possible to prevent further damage.

For those who want to modernize their homes, removing popcorn ceilings and replacing them with drywall is an excellent option. Not only does this create a cleaner look, but it can also improve indoor air quality and brighten living spaces by better reflecting natural light. If you are ready to make the switch to smooth ceilings, our experts at Paint EZ offer a safe and efficient process that’s guaranteed to deliver professional results.

Ceiling Tiles

There are many different types of ceiling tiles and they can be made from a variety of materials. The choice of material has a big impact on how the tile functions and the aesthetics. In addition to standard fiberglass, gypsum or clay options, recycled fibers and even metal are used. Some materials, like tin, can add a historical charm and others are ideal for areas with high humidity as they help keep moisture away.

Ceiling tiles are a key part of keeping a building in good repair and ensuring that it looks its best. When they get damaged, they can affect how the room is used and even compromise safety and health. For example, water damage can lead to mould and other issues that pose a health risk for those working or living in the space. It’s important to spot these problems quickly and have them fixed.

In addition, acoustic ceiling tiles can help insulate the space and keep hot air in during winter and cold air out during summer. They also block sound and reduce noise between rooms. Acoustic ceiling tiles can be replaced if they become damaged and it’s important to do so regularly to keep them functioning correctly.

Missing ceiling tiles can also compromise fire safety as they stop smoke detectors from receiving the concentration of heat and smoke needed to actuate and send an alarm. They can also prevent sprinklers from working to suppress fires and delay the time it takes for them to activate and start spreading fire retardant chemicals into the room. In addition, removing ceiling tiles can alter the flow of air and could make it harder for people to escape.

DIY or Professional?

If your ceiling has sustained significant damage, it may be best to hire a professional for repair rather than attempt DIY. This will ensure the job is done correctly and that any structural issues are addressed in time to prevent further damage. Hiring a drywall and painting company will also save homeowners the stress of dealing with a project they don’t have experience handling on their own.

The drywall and plaster restoration process requires meticulous attention to detail for an optimal finish. This includes using proper sandpaper grit for a smooth surface, which in turn enhances paint adhesion and integration of the repaired area with the rest of the ceiling. It’s also important to choose a high-grade paint compatible with plaster surfaces, which will give the finished product a polished look.

Plaster ceilings are typically made from either traditional lime plaster or modern gypsum plaster. It is essential to understand the difference between the two, as they require different restoration methods. For example, lime plaster can be sanded down for a smoother surface than gypsum plaster. It is also important to use the right tools for a plaster ceiling restoration, as using the wrong types of saw or measuring tools can lead to improper measurements and an unprofessional-looking finish.

A drywall and painting company will have access to the necessary tools, as well as years of industry experience. This means that the results will be a more professional-looking finish and will be durable enough to stand up to wear and tear. A reputable drywall and painting company will also offer a warranty on their work, providing peace of mind that their repairs will last for years to come.

Why It’s Important to Hire a Contents Restoration Specialist When Dealing With Water Damage

Extensive water damage requires extensive restoration efforts, including structural repairs and replacement of irreparable items. Moreover, postponing these repairs increases the cost of remediation and may lead to permanent property loss.

Water Damage

Mold grows quickly in damp conditions and poses a serious health threat, especially for individuals with respiratory issues like asthma. Touch walls and floors to see if they feel soft or spongy, as this indicates recent water damage. Visit https://www.allproutah.com/ to learn more.

Whether it’s a devastating flood or an inconvenient leak, water damage can be catastrophic for your most important papers. From birth and death certificates to legal contracts and family photographs, irreplaceable documents can be destroyed by water. If your important papers are damaged by water, it is crucial to take immediate action and enlist the help of professional contents restoration specialists to minimize long-term damage.

Identifying the extent of your water damage is an important first step in saving your irreplaceable documents. Wet paper is brittle, fragile, and prone to tearing and smudging. Luckily, even heavily damaged and permanently stained papers can be restored using advanced drying techniques.

If possible, try to prevent the spread of water damage from one room to another. To do this, use fans to improve circulation and blot away excess moisture with towels. You should also try to prevent the formation of mold, as it thrives in moist environments and can cause irreparable damage to papers.

Once you’ve identified the extent of your water damage, begin by separating out any documents that have not been damaged by mold. Separating wet documents will allow them to dry at different rates, reducing the risk of tearing or stickiness. After that, prioritize your documents based on their importance to you. Once a document has been separated, it’s important to handle them gently to reduce the risk of tearing.

After separating your documents, place them in a plastic storage bin or sealed bag to provide an extra layer of protection and reduce the risk of further deterioration. The best option is to keep your important documents and photos in waterproof containers or safes if possible. This will give them an additional layer of protection in the event that they are exposed to water due to a burst pipe or severe flooding. If possible, store your important documents on higher shelves or in elevated storage solutions, like crates and pallets, to further reduce the chance of them being exposed to water.

Another good way to protect your important documents and photographs from water damage is to make digital backups. By scanning and storing these documents on a secure cloud storage system, you’ll have a digital copy that can be saved in the event that your physical copies are compromised by water or another disaster.

Sentimental Items

Sentimental items such as family heirlooms, photographs, and old letters are particularly susceptible to water damage. These items not only carry a monetary value, but often have sentimental and emotional significance that cannot be replaced. Furthermore, electronic devices such as computers, televisions, and phones are especially vulnerable to moisture damage, resulting in costly repairs or even irreparable destruction.

While many of these items can be salvaged, it is important to address water damage promptly. Delaying mitigation efforts can exacerbate damage, and it may also lead to the development of mold and mildew, which can further ruin items and pose health hazards for homeowners and their families. Additionally, if water is allowed to penetrate electrical wiring or outlets, it can cause fires and create potential safety hazards for homeowners.

When sorting through items, it is essential to prioritize sentimental heirlooms and valuable items over those that are simply utilitarian. For example, a shirt from your high school team may feel sentimental to you because of the memories attached to it, but if it doesn’t have any practical use, it can be discarded.

Photographs and books are also highly susceptible to moisture damage, which can wreak havoc on their appearance and integrity. Exposure to moisture can cause ink to bleed, pages to stick together, and the material to warp or break apart altogether. These materials are easily salvageable, however, by addressing the issue promptly and taking steps to ensure proper storage and protection in the future.

It is also a good idea to consider the impact that water damage can have on sentimental heirlooms and valuables, such as antiques and artwork, which can be severely damaged by the presence of moisture. The moisture can tarnish precious metals, warp delicate frames, and ruin the beauty or functionality of these pieces.

When sorting through sentimental items, it is important to be honest with yourself about the reason why you’re keeping them. If you keep something because it would be rude or mean to discard it, or if it brings up guilt or other negative emotions, then it’s time to get rid of it.

Furniture & Upholstery

When furniture and upholstery are exposed to water damage, it can cause irreparable harm. Wooden furniture can swell and lose its structural integrity, while upholstered furniture can absorb contaminants that can lead to staining, odors, and mold growth. Water-damaged items are more likely to require expensive repairs or replacements than undamaged ones. In addition, if these items are valuable or sentimental, they can be a significant loss to the homeowner.

Furniture and upholstery are among the most common objects to experience water damage. Ignoring the signs of water damage can result in significant deterioration and costly repair or replacement costs. To prevent this, homeowners can take several steps to protect their furniture from water damage. They can apply waterproof sealants to wooden surfaces, or use heavy-duty plastic and/or canvas covers to cover entire pieces of furniture. They can also elevate and move items to a safer location (e.g., on cinder blocks) to keep them above flood waters.

In the case of metal furniture, it is important to note that it may rust if left unattended. This is due to the fact that most metals are highly reactive to moisture, which can corrode the metal finish and cause lasting damage to the furniture. Fortunately, the metal can be restored with a vinegar solution.

To address water damage to upholstered furniture, it is recommended to blot the affected areas with clean towels to remove excess moisture. Avoid rubbing, as this can spread the water deeper into the fabric fibers. To speed up the drying process, it is best to place the furniture in a well-ventilated area and utilize fans or dehumidifiers.

If a piece of upholstered furniture is heavily soaked with water, it may be necessary to dispose of the item, or to hire professional upholstery cleaning services to restore it. However, if the upholstery is not too old and the fabric is not torn, it is often possible to salvage the furniture by following appropriate restoration techniques.

Electronics & Appliances

When it comes to electronics, water and electricity are a dangerous combination. Even a little moisture can lead to corroded metal parts, circuit boards, and other critical components that may then short-circuit or break. This is why it’s essential to call in a professional for water damage repair as soon as possible after an incident of flood or leak. In addition to helping to protect your valuable devices and furniture, prompt water damage repairs can also help ensure the safety of you and your loved ones.

If you suspect your electronic device has experienced water damage, the first thing you should do is unplug it. This will minimize the chances that current is still running through it, which could exacerbate any problems and potentially endanger your life. It’s also a good idea to remove the battery and allow the device to dry for a few days before trying to use it again.

In the case of appliances, such as washing machines, refrigerators, and dishwashers, it’s important to avoid turning them on once they’re wet. If you try to turn on a washing machine that has experienced flooding, for example, the motor can become damaged and may burn out. Instead, you should call a professional for an assessment of the damage.

While the immediate impact of water damage might be a loss of belongings and structural integrity, there are hidden consequences that can have lasting effects on your health and well-being. For instance, exposure to mold can trigger respiratory issues in people with allergies and asthma. It can also cause itchy eyes, sneezing, and itching of the skin.

Furthermore, water damage can wreak havoc on your home’s electrical system, posing a significant fire risk if left untreated. This is because a little water can reach outlets, junction boxes, and wiring inside walls, causing corrosion that may ultimately disrupt connections and create heat. This often goes unnoticed, until faulty outlets start burning out or you begin to experience unexplained electrical failures. If you think your home’s electrical system might have been affected by water damage, it’s vital to book an emergency electrician immediately.

The Importance of Proper Dock Repair

Wood naturally rots and degrades over time. Dock Repair involves a thorough inspection of wooden dock posts and planks. This includes going underwater with scuba or snorkel gear to inspect the integrity of the dock.

Dock Repair

Unsafe docks can lead to serious injuries and property damage. Proactive maintenance and timely repairs will save you money and prolong the life of your floating dock. Learn More Here by reading the article below.

Floats are the foundation of floating docks, and they help to keep the structure stable and buoyant. However, if damaged or worn down, they can significantly reduce the structural integrity of your dock. A sagging or unstable dock is a safety hazard, and it can also detract from the overall aesthetic of your waterfront property. Fortunately, repairing and patching dock floats is a simple process that can save you money and ensure that your dock is safe to use for years to come.

As with any other type of boat or marine vessel, floats experience some wear and tear over time from exposure to saltwater and harsh environmental conditions. It’s essential to inspect and repair your dock floats regularly for damage, debris buildup, and algae growth.

To repair a ding in a dock float, first clean the surface with mild soap and water to remove any dirt or debris. Then, sand the area lightly with fine-grit sandpaper to smooth it out and prevent any further damage from occurring. It is also important to use a waterproof sealant such as Belzona 2211 to ensure that the ding will not leak.

Most dings and scratches on a dock float can be easily repaired by using a touch-up paint or stain. However, a severe dent may be unrepairable.

Inspect the floats for visible damage, such as cracks or drain holes. You should also check for a low freeboard, which can indicate compromised buoyancy. If you notice any of these issues, it is crucial to take immediate action to avoid water intrusion and structural damage.

The most common causes of damage to a dock float are corrosion, punctures, or physical damage. Corrosion is typically the result of prolonged exposure to saltwater. It can accelerate the deterioration of the float, so it’s important to protect them with protective coatings and apply regular maintenance. Moreover, punctures can be caused by objects such as anchor chains, fishing lines, or other gear.

Warped Boards

Wood warping is a common problem that can be caused by a variety of factors. However, the two most significant causes are moisture and temperature. When a piece of wood is exposed to excess water or extreme heat, the cells within the fibers expand and contract at different rates, which leads to the warping of the board. This can be prevented by ensuring that your boards are properly stored and covered.

When storing your wood boards, make sure that they are laid flat and on an elevated surface if possible. This will help to prevent any potential moisture damage and also give the fibers in the wood a chance to stabilize themselves. It’s also important to cover your boards with a waterproof coating or sealant, which will further protect the fibers from moisture and help them stay in good shape.

Once a piece of wood is warped, it can be difficult to get it back into a usable state. Depending on the severity of the issue, it may be easier to use a shorter piece of wood instead of trying to fix the entire length of the board. However, if you are determined to use the board, there are some ways to fix it.

One way to get rid of a warp is to apply pressure. To do this, first soak a towel in water and then wrap it around the warped board. Next, place the wrapped board on a solid surface and expose it to sunlight. Over time, the heat from the sun will gradually straighten out the board.

Another way to get rid of a warp involves using a jack plane. This is a tool that requires some experience and knowledge to use safely, but it can be effective in getting rid of a warp. First, look at your warped board and identify the side that has a C or cup shape. Then, use the jack plane to remove some of the wood from the top of the board, which will help it to straighten out.

You can also try applying a heating device to your wood, such as an iron or a hair dryer. This will also help to straighten out the boards and can be especially useful if your board is experiencing bowing.

Corrosion

Over time, metal components of a dock can start to show signs of corrosion. This may occur due to abrasion or exposure to salt water. Corrosion can weaken the structural integrity of a dock, making it more vulnerable to damage from waves and marine life. When a dock experiences corrosion, it is important to get it repaired right away.

A professional repair crew will first examine the dock for any problems that need to be addressed. This includes examining the decking, floats and supporting pilings and piers for signs of rot or corrosion. It is also important to check for any areas where the decking or planks are splintering, which can cause safety hazards. The professionals will also inspect the floats for cracks or any other issues that could make them unreliable.

If the floats have been damaged, the professionals will begin to replace them. Before doing so, they will make sure the floats are detached from the dock in a safe manner. This will often involve chipping away at rusted bolts or untying knots that hold the floats together. Once the floats are replaced, the crew will apply a waterproof sealant to help protect the new floats from further damage.

When it comes to repairing a dock, the most important thing is that the professionals do it in a safe and secure environment. This includes wearing protective gear and ensuring that no one is around while the work is being done. The crew should also prepare any tools or materials they need before beginning the repair process. For example, they should have threaded plastic plugs ready to cover any old vent holes in the floats.

Performing regular maintenance on a dock can reduce the need for repairs, but even with proper care, all docks will need replacement eventually. Knowing when to choose repair over replacement can save money and prevent serious injuries. Learn how to recognize the difference between a repairable and a replacement dock, so you can keep your waterfront home safe and functional for years to come.

Wood Rot

Wood rot is a serious and often dangerous issue that can damage the integrity of structures such as decks, docks and homes. It’s caused by fungus and can lead to significant structural damage and pose health problems such as mold inhalation. Fortunately, both wet and dry rot can usually be repaired with preservative treatments. However, the extent of treatment will depend on the extent of the damage and the type of fungus present.

Wet rot is typically less severe than dry rot and can usually be treated by removing the affected boards and treating new boards with a preservative that kills the fungus. Dry rot is harder to treat and requires a more extensive process. First, the spores of the fungus must be killed. This is accomplished by applying a solution such as boric acid to the damaged timbers. This is then covered with a special mixture that stops the fungus from spreading. Once the fungus has been killed and the timbers are thoroughly dried, a wood filler can then be used to repair any holes or cracks.

Depending on the type of fungus, if the damage to wood is severe, it may be necessary to replace it entirely. This is a complex and time-consuming task that should be left to professionals. However, replacing damaged wood is a good way to upgrade the appearance of a structure, as well as to add some decorative elements to a home.

Fungus attacks the cellulose, hemicellulose and lignin in wood which is why it’s essential to keep wooden materials as dry as possible. In addition, fungus grows much faster in moist conditions. That’s why it’s important to have regular inspections of your property and catch plumbing leaks and roof leaks as soon as they occur.

The most effective way to avoid wood rot is to use the best quality wooden materials that you can afford, especially in areas exposed to the elements. It’s also a good idea to choose pretreated wood, as this will be more resistant to the growth of fungus than untreated wood.

Why Gutter Cleaning Is Necessary

Clean gutters help to direct rainwater away from the house, protecting it from foundation cracks and roof leaks. Unfortunately, many homeowners neglect this critical part of home maintenance.

Gutter Cleaning

Gutter cleaning is a labor-intensive and risky DIY project that has several pitfalls, including safety concerns, time constraints, limited effectiveness, and weather dependencies. Contact Gutter Cleaning Vero Beach for professional help.

Gutter cleaning is a necessary chore that helps to ensure that rainwater can drain properly, protecting the house’s foundation and preventing water damage to its exterior. However, debris accumulation can also create ideal breeding grounds for mold and pests that threaten the health of the home’s interior.

The most straightforward sign that your gutters are overdue for a cleaning is the visible presence of accumulated dirt, leaves, twigs, and other waste matter. Fall is the ideal time to perform this task, as deciduous trees shed their leaves in autumn, which makes it easy to spot and remove debris.

Before you begin, clear the area around your gutters and move any items that could interfere with your work. Then, select and prepare the equipment you will use to clean the gutters. A leaf blower, wet/dry vac, garden hose, or pressure washer can all be used to remove debris from the gutters. If using a power washer, be sure to wear safety goggles and a dust mask. Start at one end of the gutter and gradually work your way around, avoiding pushing debris into the downspouts.

If a clog forms, try using a plumbing snake or inserting the end of a garden hose into the clogged downspout to break up the clog and flush it out. If this is ineffective, a high-pressure nozzle attached to the garden hose can be used to spray pressurized water down through the gutter and into the downspout, breaking up and flushing out any remaining clog material.

Inspecting the Gutters

Inspecting the gutters during cleaning is important to identify any potential problems and address them before they turn into major issues. This can help prolong the lifespan of gutters and protect property from damage.

Ideally, the gutters should be inspected twice a year, once in spring and once in fall. This helps to ensure that any blockage-causing debris is removed before summer storms arrive and that the gutters are in good repair.

When inspecting the gutters, look for signs of rust spots, sagging sections, and standing water. Standing water can cause staining, rotting, and mold growth. If it isn’t addressed, this can lead to costly roof and siding repairs.

It is also a good idea to check the downspouts for clogs and to make sure that water is flowing freely. If it isn’t, there may be a problem with the slope of the gutters or the pitch of the roof. This can be corrected by re-sloping the gutters or installing a drain guard.

Safety Concerns

When working at heights, such as when cleaning gutters, safety is the top priority. Ladder accidents are one of the leading causes of DIY injuries during home maintenance, and gutter cleaning is no exception. The risk is exacerbated by rushing to complete the job, but it’s important to follow ladder safety guidelines to avoid injuries. This includes keeping both feet on the ladder at all times, using a spotter when climbing and never overreaching.

In addition, workers should wear gloves and eye protection to protect themselves from debris, bacteria, vermin and other dangerous contaminants. Gutter cleaners often use a ladder to reach the roof and can be exposed to bird, pigeon and squirrel droppings, as well as rotting leaves, twigs and other organic materials that are full of potential pathogens. It’s also vital to use a ladder that is secure on the ground and not located near power lines.

It’s also recommended to use a sturdy ladder and to have a partner on hand to help stabilize the ladder when repositioning it for better access. It’s important not to overreach because doing so could cause the ladder to tip, sending you crashing to the ground. Also, be sure to wear shoes with traction to avoid slipping on the ladder or on the gutters themselves. Lastly, be mindful of any nearby power lines that may be exposed during your cleaning session and stay away from them to prevent electrocution.

Time Constraints

Gutters may not be the flashiest part of your home, but they perform a very important function. They direct rainwater away from your foundation, roof, and walls to prevent damage. However, clogged gutters can cause major problems. For example, water can leak into walls or the basement, mold and mildew can develop, and mosquitoes and other pests can be attracted to stagnant water. Regular gutter cleaning can help reduce the risk of these issues.

While it’s not the most fun task on your to-do list, gutter cleaning can be done fairly quickly and easily if you have the right equipment. This includes a ladder, gloves, a gutter scoop or shovel, and a bucket or tarp to catch the debris. Some people also use a gutter snake to remove stubborn clogs.

Gutter cleaning should be done on a dry day to make the task easier. This is especially true if you live in an area with many trees that shed their leaves during autumn and spring. It’s a good idea to clean gutters at least twice a year, once in the fall and once in the spring.

If you have a large, steeply pitched roof or live in an area with many trees, it’s important to clean your gutters more frequently. A professional service can handle the task for you, improving your home’s appearance and increasing its value. They can also help you choose the best gutter screens or guards to minimize future clogs and blockages.

Limited Effectiveness

Gutter cleaning is an important part of regular home maintenance, as it helps prevent water overflow that can damage roofs, siding, and foundations. It also discourages pests from finding shelter in clogged gutters and facilitates proper wastewater management. However, this task can be challenging for homeowners to complete themselves. The best way to avoid this task’s inherent risks and complexity is by hiring professional services.

While there are many benefits of hiring a professional to clean your gutters, the upfront cost may be prohibitive for some homeowners. Additionally, this service may require specialised equipment that homeowners don’t typically own. This can include a ladder, gutter scoops, and other safety-related tools. Moreover, it’s recommended that homeowners hire a team of professionals that specialise in roofing and gutter cleaning to ensure quality results.

While a gutter vacuum is effective at removing dry leaves, twigs, and other debris, it’s limited in scope compared to traditional methods. Furthermore, it can be difficult to use this tool on wet or compacted debris. A leaf blower is also quick and easy to use, but it only removes loose debris and may leave behind stubborn dirt build-up. A hose can be used to rinse away the remaining debris, but it’s not as effective for addressing wet or clogged debris. There are also several chemical cleaners available on the market that can be used to clean gutters. These include F-13, Purple Power, Krud Kutter, LA Awesome, and Simple Green. However, some of these chemicals can be dangerous to use and should only be used by professionals.

Risk of Damage

Clogged gutters provide ideal breeding grounds for mosquitoes, notorious carriers of diseases such as the West Nile virus and Zika. Rodents, birds, and insects like ants can also make their homes in the debris. This creates a health hazard for homeowners and their family members.

In addition to health hazards, pest infestations, and landscape erosion, neglecting gutter cleaning can lead to costly structural damage to the home. Gutters are designed to manage the flow of rainwater, directing it away from the foundation and walls of the house. When gutters become clogged, water overflows and floods these areas, potentially leading to rot and mold growth inside the home. Over time, rotting wood can weaken the structural integrity of the home’s foundation and walls.

Additionally, flooded soil around the house can wash away mulch and other ground coverings, leaving the yard vulnerable to weeds and erosion. Excessive water can also saturate the soil, drowning plants and washing away their roots. As a result, the landscape surrounding the house can quickly become unattractive and difficult to maintain. Regular gutter cleaning can ensure these problems are prevented and keep your landscaping healthy and beautiful.

Clearing the Path: Fresh Insights on Rubbish Removal and Demolition

Rubbish removal shapes the foundation of healthy environments. It is no longer just about cleaning spaces. Today, it’s a calculated move in urban sustainability. Communities increasingly value organized waste handling.

Rubbish Removal

Traditional removal methods are slowly being replaced. Smarter, tech-driven solutions are gaining attention. Innovations such as AI waste sorting redefine waste collection. This improves efficiency and reduces manual errors. Visit https://paulsrubbishanddemo.com/ to learn more.

Demolition is evolving with purpose and sustainability. It’s not merely tearing down structures anymore. Smart demolition involves salvaging reusable components. Materials like timber and concrete are now often recycled.

There’s a noticeable shift to circular practices. Items once considered trash are now resources. This mindset saves money and reduces environmental impact. It also reshapes how society defines “waste.”

Modern projects demand faster turnaround times. Hence, integrated rubbish removal within demolition plans is vital. It prevents project delays and site hazards. Workers perform better in uncluttered, hazard-free zones.

Demolition noise and dust raise concerns. Innovative dust suppression systems are being tested. Water mist cannons and biodegradable foams are used. These protect both laborers and nearby communities.

Safety remains a priority in both industries. Remote-controlled demolition tools are now common. These reduce physical risks and boost accuracy. Workers handle dangerous tasks from a safe distance.

Robotics play a growing role in debris management. Autonomous bots now sort and separate waste. These machines minimize manual labor and speed up processes. This shift also reduces injury cases on site.

Smart bins are transforming household-level rubbish handling. These bins notify collectors when full. Some even separate waste using internal scanners. Such systems reduce landfill overflow and increase recycling rates.

Mobile apps are being developed for waste scheduling. Users can now arrange pickups with a few clicks. This removes guesswork and improves collection efficiency. Communities become cleaner and more organized.

The demand for green demolition practices is rising. Projects now prioritize eco-friendly tear-down methods. For example, deconstruction is preferred over explosive demolition. It allows better control over resource recovery.

Rubbish removal services are adopting data analytics. Trends in waste production are tracked. This helps forecast future waste volumes. It also ensures that equipment and manpower are allocated effectively.

Construction debris remains a major waste contributor. Bricks, metals, glass, and plastics pile up fast. Specialized removal teams focus on sorting them. These efforts reduce landfill use and support resource recovery.

Illegal dumping continues to be a challenge. It affects property values and public health. Governments respond by introducing digital surveillance systems. These help monitor hotspots and catch offenders.

Public awareness programs have intensified recently. More campaigns now target waste segregation at the source. Educational videos and online guides are popular tools. People become more involved in waste management.

Virtual reality is entering demolition training sessions. Workers use VR to simulate dangerous demolitions. This improves preparedness without real-world risk. It ensures that teams are ready for live operations.

Regulations are evolving to support safe practices. Permits now require detailed waste disposal plans. Fines for improper disposal have increased. These moves promote responsibility in both individuals and companies.

Eco-bricks made from demolition waste are gaining traction. Plastic-filled bottles now form strong building blocks. These are used in non-load-bearing structures. It’s a creative way to reuse plastic and reduce rubble.

Drone surveys are changing how demolition sites are managed. Drones provide aerial updates on waste accumulation. Managers use the data to redirect crews. It prevents bottlenecks and ensures smooth progress.

Some startups are turning waste into art. Demolition scrap becomes sculptures and functional pieces. This brings value to discarded materials. It also raises interest in creative reuse strategies.

Biodegradable bags are being tested on demolition sites. These help manage soft waste like insulation and plastic films. The bags decompose naturally over time. It’s a step toward cleaner construction zones.

Geotagging of rubbish piles allows traceability. Teams know exactly where and when waste was created. This data supports better planning and accountability. It also limits the chance of illegal dumping.

Microdemolition is ideal for densely populated areas. Small equipment handles tasks with minimal disruption. It’s precise and causes less noise and debris. More contractors prefer this in tight urban zones.

Fines for construction waste mismanagement are rising. Enforcement officers now use handheld scanners. They instantly check if waste is tagged or sorted. This adds transparency and keeps companies in check.

Rubbish removal is crucial after natural disasters. Fallen trees and debris must be cleared fast. Emergency teams now use modular shredders. These break down bulky waste for easier hauling.

Architects now design for future disassembly. Buildings are constructed with reusable modules. This allows smoother demolition later on. It reduces both waste and future demolition costs.

Thermal imaging is aiding demolition safety. It detects unstable structures before entry. Workers can assess risk from a distance. This ensures safer tear-downs in older buildings.

The rise of prefab construction reduces waste upfront. These structures generate minimal on-site waste. Leftover material is reused in other modules. It limits the load on removal teams.

Augmented reality helps in identifying hidden hazards. Crews see pipe layouts and wiring before tearing down. This prevents accidents and infrastructure damage. The tech boosts both speed and precision.

Waste-to-energy solutions are being piloted more widely. Demolition debris is converted to biofuel or electricity. These systems support local grids in remote areas. They also lessen dependence on landfills.

Recycling hubs now offer rewards for sorted waste. Households and contractors earn points for compliance. These can be exchanged for discounts or tools. It’s a clever way to encourage participation.

Smart labels are used to tag waste types. These contain data about origin and composition. Removal teams scan them before disposal. It ensures that the right waste goes to the right facility.

Contractors now sign green demolition pledges. These documents outline eco-goals and practices. Clients use them to gauge responsibility. It aligns projects with broader sustainability goals.

Digital twin technology is entering demolition planning. Virtual replicas help strategize tear-downs better. They simulate various outcomes and hazards. Teams can test plans before real-world execution.

Remote sensors track bin fill levels in real time. This cuts unnecessary collection trips. It saves fuel and lowers emissions. It’s a simple but impactful tech upgrade.

Waste mapping apps guide citizens to proper disposal spots. These apps reduce random street dumping. They also connect users to removal services. Urban cleanliness improves as access grows.

Some companies now offer subscription-based removal plans. Users pay monthly fees for routine pickups. This encourages regular, small-volume disposal. It prevents large waste piles from forming.

New composite materials reduce construction waste. They are durable and recyclable. When demolished, they separate cleanly. This makes the disposal process smoother and cleaner.

Community cleanups now use gamification. Volunteers join cleanup drives through mobile games. Points, ranks, and badges make it fun. This boosts engagement and long-term participation.

Upcycled demolition materials support local businesses. Old wood becomes shelves or tables. Bricks turn into planters or paving stones. This builds a micro-economy from what would’ve been trash.

Digital permits now auto-verify rubbish handling plans. These platforms cross-check contractor compliance. They reduce red tape and corruption risks. Approval becomes faster and more transparent.

Recycled concrete is used in road construction. Crushed materials become reliable base layers. This reduces need for quarrying new stone. It brings cost savings and environmental perks.

Cloud-based systems manage multi-site rubbish tracking. They offer centralized dashboards for large firms. Managers monitor volume, costs, and schedules. This supports better decision-making and accountability.

Rubbish removal and demolition are becoming intertwined. The future lies in syncing these processes. Together, they shape safer and greener spaces. With the right strategies, even waste becomes a resource.

How Long Does Roof Installation Take?

Installing a new roof is a substantial home improvement project that may take days or weeks to complete. The duration depends on several factors.

Roof

A well-executed roof installation shields your home from harsh weather conditions and lowers energy bills. It also prevents moisture damage and structural issues. Contact Roof Installation Massachusetts for professional help.

To start, roofers remove the existing roofing materials and inspect the roof deck. They then install underlayment to act as a barrier against water and ice. They also install flashing around chimneys and vents.

Preparatory Work

When you hire professional roofers for your home’s roof installation, they will perform a variety of preparatory tasks to ensure that the new roofing materials are installed properly. This is done to prevent leaks, water intrusion, mold and other problems that can damage the integrity of the structure.

A top-tier roofer will prepare the work area by removing old shingles, underlayment and flashing. This process exposes the bare roof deck and allows our local roofers to inspect the condition of the deck and make any necessary repairs. It also helps to detect any hidden damage or rot that may be present.

After the deck is inspected, our roofers will install underlayment. This is a waterproof barrier that protects the roof from moisture infiltration. It is typically made of felt or synthetic material. Our roofers will then install ridge vents and soffit vents to promote proper airflow and to help keep your home cool and comfortable. They will also clean and seal gutters to prevent debris from entering your roof or overflowing the gutters and causing water backup and damage to the deck of the roof.

Finally, they will install flashing. This is a metal material that is installed around chimneys, vents and other protrusions on the roof to keep water from sneaking in at those vulnerable spots. Our local roofers will pay close attention to the edge details, ensuring that all seams are tightly sealed and watertight.

In addition, our professionals will prepare the roof for shingles or panels by cutting a slot along the ridge and installing ridge vents. They will also install soffit vents to promote airflow and to keep your home cool and dry.

While you can do some of the preparatory work yourself, it is best to leave this job to professional roofers. They have the training, expertise and tools to do it safely and quickly. In addition, they know the building codes and regulations in your area and will ensure that your roof is built to withstand harsh weather conditions. They will also be sure to follow all local and federal laws regarding asbestos, hazardous waste and other environmental concerns.

Materials

A quality roofing system requires a number of materials to provide protection and durability. The right choice will depend on a homeowner’s budget, style preferences and climate. Durable options like slate, concrete and clay tiles offer longer lifespans than asphalt shingles but may require higher upfront costs or structural reinforcement.

Sheet sheathing, such as plywood or oriented strand board (OSB), provides a stable base for a roof and serves to seal the deck against moisture damage. It also protects the underlying structure from the elements. Water-resistant underlayment is placed over the sheathing and helps prevent leaks at areas like eaves, valleys and dormers. Flashing is then installed to prevent water from entering at these points.

Tile roofs, such as slate, concrete or clay, are popular options for premium roofing. They are durable in extreme weather and come in a variety of shapes, sizes and colors. They are expensive, however, and can put a significant strain on the existing roof structure.

Wood shingle roofs, such as cedar shake or composite shingles, are also durable options. They can be more affordable than natural slate or clay, and they are versatile enough for many styles of homes. They can be a poor fit for certain climates due to their high water absorption rate and are fragile in very cold temperatures.

Other roofing materials include metal roofs, single-ply membranes and shingle-over-metal systems. These roofs are ideal for commercial buildings and flat or low-sloped residential roofing. Metal roofs are extremely durable and rust-resistant, but they can be noisy and difficult to install. Single-ply membranes are highly durable, watertight and resistant to punctures and chemicals. They are usually made from EPDM or TPO, and they have reflective surfaces to help reduce cooling costs.

A shingle-over-metal system is similar to single-ply membranes but with the added benefit of insulation for additional energy efficiency. It is ideal for metal roofs, tin roofs and some asphalt shingle roofs. It is best suited for warm weather and may be damaged by extreme cold temperatures or hail storms.

Installation

A well-executed roof installation provides a barrier against the elements, protecting your home from rain, snow, wind, and extreme temperatures. It also helps to improve your energy efficiency, reducing your heating and cooling costs. However, a poorly installed roof can cause water intrusion, moisture damage, and structural failures.

An expert roofing team can help you choose the best roofing material for your needs, architecture, and budget. They can also recommend different roofing systems that meet your building codes and regulations.

During the roof installation, professionals place underlayment to prevent moisture from seeping into the roof deck and wood structures. They then install the new shingles or roofing materials, starting with the starter row at the eave and then laying each main shingle in a staggered pattern, following the manufacturer’s instructions for spacing and alignment. They also install flashing around chimneys, vents, dormers, TV satellite dishes, and other protruding features to help prevent leaks.

When they’re finished, the roofers will remove any old shingles or panels and dispose of them safely. They’ll then sweep and clean up the work area, making sure there are no lingering nails or debris on the lawn or driveway. Finally, they’ll perform a leak test and complete the inspection.

Final Inspection

A professional roofing company should conduct a final inspection to ensure that the installation is complete and meets quality standards. They should also clean the work area and remove any debris. This helps to prevent any problems in the future and protects the homeowner’s investment.

The final inspection is a pivotal step in the building process and must be completed before a building can receive a certificate of completion or occupancy. It is a quality assurance check that ensures the finished product meets customer expectations, safety standards, and legal requirements. Conducting a final inspection minimizes disputes and complaints, enhances customer satisfaction, and improves operational efficiency.

Structural Integrity: The inspector will assess the building’s frame, walls, and ceilings for any signs of structural weakness or instability. They will also evaluate the insulation, windows and doors, HVAC systems, and fire prevention systems. In addition, they will inspect the plumbing piping, drains, and fixtures for compliance with local codes and regulations.

Electrical Systems: The inspector will review the wiring, electrical panels, and lighting fixtures for compliance with safety regulations. They will look for issues like exposed wiring and defective lighting that may pose a threat to the safety of residents.

Quality Validation: The inspection will confirm that all construction work is in substantial compliance with the approved construction documents and this code. This can help avoid legal trouble and costly repairs in the future. Resale Value: A home with a record of successful inspections will be more attractive to potential buyers, as they will know that the property has been well-maintained and is safe for living.

Whether you are constructing a new residential or commercial building, or conducting renovations, a thorough final inspection is essential to protecting your investment. A qualified and experienced home and commercial building inspector can ensure that your project is completed to the highest standard and in compliance with local codes and regulations. 

The Importance of Roof Inspections

Detecting roofing problems early during a thorough structural inspection allows for appropriate remediation, potentially averting the need for an entirely new roof. Moreover, it enables building owners to plan for future maintenance and repairs, helping them to make the best use of their roofing investment. Visit www.fivestarroofingandcontracting.com/ to learn more.

Roof Inspections

Flashing is a thin layer of weather-resistant material installed in the joints and edges around roof penetrations like chimneys, skylights, and vent pipes. It redirects water away from vulnerable areas and prevents leaks, which can cause structural damage to the roof and underlying building materials.

A complete roof inspection includes a careful examination of the flashing to identify potential problems and keep the building watertight. During this process, the inspector checks the flashing for damage, loose sections, and the presence of gaps. If any of these problems are present, the inspector will take steps to repair them.

The flashing is typically made of metal, such as aluminum or galvanized steel. It’s often layered with caulking or roofing cement, which provides a strong seal. However, the sealant can break down from exposure to UV rays and moisture over time, leaving the flashing exposed to the elements. This is why regular roof inspections are so important.

During a roof inspection, the inspector will examine the flashing for cracks and rust. He or she will also ensure that the flashing is properly installed at all penetrations, e.g., that step flashing (required by asphalt, slate, and wood shingle manufacturers at sidewalls) is adequately extended up behind the exterior wall covering and that it forms a tight overlapping pattern with the roof deck to shed rainwater. Inspectors will also check that flashing at roof valleys is long enough to handle the heavy water runoff that occurs in these areas.

The inspector will also look at the flashing in other vulnerable areas of the roof, such as the eaves and rake edge. He or she will check for corroded flashing, loose pieces, and missing caulking or sealing. Loose flashing should be resealed or reattached to maintain the protective barrier.

In addition to inspecting the roof’s surface, a professional roof inspector will also examine the attic and interior ceiling for stains and other signs of moisture intrusion. He or she will also evaluate rafters, joists, and decking from the inside to check for moisture stains or structural weaknesses.

Shingles

The shingles are the roof’s outer layer and an important part of the overall roofing system. They protect the wood framing of a house and prevent moisture from damaging interior components. When a home’s shingles are in poor condition, it can lead to water leaks that damage the internal structure and cause mold growth. Regular inspections are important for identifying issues and maintaining a healthy roof.

When inspecting a shingle roof, look for cracks and creases along the edges of the shingles. Also, check for granule loss. This is an indication of aging and exposes the underlying material to UV rays, causing it to deteriorate faster.

Other signs of deterioration include dark patches on the roof and algae growth. If the shingles are damaged, it is likely that they will need to be replaced. In addition, you should look at the gutters and eaves for signs of rot. Rotted eaves are an indication that water is not being properly routed off the roof.

It is also a good idea to inspect the attic for water stains and damp insulation. A leaking roof can cause serious problems within the home and even structural damage to the framing. It is best to identify problems early on, before they become more severe, to minimize the cost of repair and replacement.

If a new roof is being installed, make sure that the installer is using proper installation techniques. Also, pay attention to the roof flashings, which should be fully secured to the deck and the shingle tabs. Also, be sure that the shingles are being installed according to manufacturer’s specifications.

A roof inspection is an important step in purchasing a home. A poorly maintained roof can be very expensive, and a home inspector can help you spot issues that may need to be addressed. Having the problems fixed before closing can save you money and hassle in the long run. It is also a good idea to negotiate with the seller to pay for any needed repairs during the home inspection period. This will allow you to close on the property quickly without any delays.

Gutters

While most roof inspections focus on the main components of the roof, it’s important to pay attention to gutters, soffits, and fascia as well. These accessories are necessary for maintaining the integrity of the roof and preventing water damage to the siding, foundation, or crawl space. During a roof inspection, home inspectors look for signs of damage or clogging that can prevent these devices from working properly.

A gutter is a trough or indentation along the edge of a roof that carries rainwater away from a structure, usually to a drain. Gutters are a good idea for structures that sit at the bottom of a slope, as they can help prevent erosion and other problems by channeling water away from the structure.

Home inspectors use a ladder to examine the condition of gutters and downspouts during a roof inspection. They typically check that the gutters are free of branches, leaves, and other debris, which can impede flow. They also look for rust, cracks, or sagging sections that may need to be replaced. They also check that the gutters are securely fastened to the fascia and downspouts.

Roofing professionals will often replace the gutter system when they do a roof replacement, which is one of the best times to do so since the contractor can take advantage of the opportunity to make any needed repairs to the siding and other components that are exposed when the old gutters are removed. Gutters are available in a variety of materials, including metal and seamless aluminum, which won’t rust or leak. A professional will calculate the size that meets a property’s needs and install it accordingly.

It is essential to inspect gutters for the presence of ice dams and other underlying issues. If they are not addressed, ice dams can cause moisture intrusion to the sheathing of a roof and may require additional repairs or even replacement. In addition, if the gutters aren’t installed correctly, they can clog or become flooded with water, causing overflow and potentially leaking into the house. Professional roofers can address these issues, as well as evaluate shingle damage, and recommend any necessary repairs or replacements.

Vents

The vents of a roof are more than just an architectural detail; they play a significant role in attic ventilation, which in turn impacts the lifespan and performance of a house’s roof. A well-functioning roof vent system ensures that fresh air flows into and out of the attic, helping to regulate temperature and preventing moisture buildup and mold.

Exterior vents are found on the ridge or peak of the roof and can be made of a variety of materials. Continuous/ridge vents run the entire length of the ridge or most of it, and are used for exhaust, allowing warm air that rises to the attic to escape. Box vents, on the other hand, are placed in locations that are not visible from the front of the home, blending in with the rest of the roofline and preserving aesthetics.

During your roof inspection, be sure to check all exterior structural elements such as pipes and equipment for cleanliness and damage including cracking paint, rust, moss or fungus. Be especially sure to check for sagging pipes, deflected supports and parts digging into the roof membrane, which are signs of deterioration and leakage.

What You Should Know About Bathroom Remodeling

If you’re thinking of giving your bathroom a face-lift, there are several things you should consider before beginning the project. For example, where will you keep your toiletries and towels during remodeling?

Bathroom Remodeling

A full remodel typically involves expanding square footage and moving walls. It’s important to work with a contractor who has experience managing this type of project. Contact Bathroom Remodeling Warrington PA for professional help.

A bathroom remodeling project is a great way to add value and convenience to your home. But it can be challenging to decide on the right design for your space. There are many factors to consider, from style and materials to functionality and storage.

To help you create your dream bathroom, start by choosing a layout that maximizes space efficiency. Then, think about how you use your bathroom on a daily basis. Do you need a place to store extra toilet paper and cleaning supplies, or do you want a deep soaking tub for relaxing after a long day?

You should also consider the lighting in your bathroom. A good lighting plan incorporates ambient, task and accent lighting to achieve a balanced and functional environment. Finally, you should choose durable and water-resistant materials that reflect your personal taste.

Once you have a layout and design in mind, you can start to figure out the details of your remodel. This includes deciding where the sink should go, what type of faucet is best, and what kind of showerhead you’d like. Other decisions you’ll make with your design-build team will include dimmer switches, light fixture placement, and integrating smart lighting, among others.

Another aspect of the design process is deciding what color to paint your bathroom and what kind of mood you’d like to create. For example, light colors can open up a room and make it feel larger. Warmer tones, on the other hand, can create a cozy, inviting ambiance.

While you’re choosing your finishes, it’s important to stay within your budget. If you’re overspending, you may need to rethink your design or find ways to cut costs. This could mean opting for less expensive tiles or reworking your existing cabinetry instead of replacing it.

Lastly, you should also consider adding features that make your bathroom accessible for people with disabilities. This is especially important if you plan on selling your home in the future. Accessibility features such as grab bars, non-slip flooring, and lever-style faucets can increase safety and ease of use for people with mobility challenges.

Planning

Bathroom remodeling is a complex process that takes a significant amount of planning before the first tile is laid or fixture installed. This includes determining what improvements you want to make, selecting materials that will meet your design goals, and ensuring that all of the necessary construction and renovation work is done to adhere to local standards and regulations. It also involves establishing a budget, hiring contractors, and securing permits. Skipping this step can lead to fines and complications during resale, so it’s important to thoroughly assess your needs and choose the right professionals for the job.

During the planning phase, you’ll review sketches and floor plans with your contractor to determine the final layout. This will give you an idea of how your bathroom will look when the project is finished. It’s essential to take into account any special considerations that may arise during demolition, such as rerouting plumbing or electricity or removing old fixtures. It’s also a good time to consider the environmental impact of your remodel. This can be accomplished by implementing recycling and waste-reduction techniques, such as removing any hazardous materials and properly disposing of debris.

It’s also critical to evaluate your remodel options and establish a realistic budget. This will help avoid costly surprises down the road. It’s a good idea to consult with experts to gain a better understanding of the costs associated with different types of remodels and how they will affect your overall cost.

A major benefit of remodeling is boosting your home’s value. If you’re thinking about selling your property in the future, it’s a smart idea to analyze trends and market data to see what upgrades will appeal to buyers. You can also look for inspiration in your neighborhood and talk to designers, friends, or neighbors to get a sense of what adds value to homes in your area.

Another way to improve your home’s value is by including accessibility features in your remodel. This can include items such as a wheelchair-accessible walk-in shower, lowered sinks, and grab bars. These features can increase your home’s resale value by making it easier for older family members or guests to use the bathroom, while also promoting independence and preventing accidents.

Demolition

The demolition phase of a bathroom remodel is an important one. This is where the old materials are ripped out, and this process can take anywhere from a few hours to two days. Once the old material is removed, a contractor will start framing the walls and putting in plumbing and electrical systems to meet code requirements for the bathroom.

Before the demolition begins, it is important to make sure that all water lines are shut off and drains are turned off in order to prevent any accidental flooding. It is also a good idea to rent a dumpster to contain all of the debris and trash that will be generated throughout the project, which will cut down on cleanup time at the end.

During this phase, it is common for problems to be discovered that weren’t originally apparent during the planning stage. For example, your contractor may need to reinforce the floor or change the foundation if it is found that it is not structurally sound. This can add to the overall cost of the project, but it is crucial for the safety and integrity of the entire bathroom.

Once the structure is in place, it will be time to install new fixtures and tile. This is where the renovation really comes to life, and it is when all of your plans will begin to come to fruition. At this point, it is a good idea to make a list of your “must-haves” and “nice-to-haves” in order to create a budget that will allow for the full scope of work.

Renovating your bathroom is a great way to add value to your home and it is also a good way to increase the functionality of the space. However, it is important to understand the difference between remodeling and renovating in order to avoid any misunderstandings with contractors. While both projects can add value to your home, they do so in different ways and on a different scale. The choice to renovate or remodel your bathroom will ultimately be based on your preferences and goals for the future of your home.

Installation

The installation phase of a bathroom remodel is where the design plan transitions from paper to reality. This step requires a combination of precision, safety, and foresight to ensure that the new components are installed properly and that they align with the existing layout. The correct sequence is important to avoid any unnecessary delays, and it’s essential that the proper materials are used.

During this phase, any electrical and plumbing work needed is completed. This can include things like adding GFCI outlets, installing dedicated circuits for the bathroom, or bringing the plumbing up to code (i.e. leaking or outdated fixtures and pipes, missing shutoff valves, etc).

In some cases, it may be necessary to obtain a permit for the renovation, especially if the change is significant. This is something to keep in mind as you plan and prepare for your remodeling project, and it’s important to discuss any potential permitting requirements with your contractor before starting.

Before beginning any demolition or construction, it’s a good idea to have a clear and detailed estimate from your contractor. This will help you set a realistic budget and make sure you’re on the same page as your contractor throughout the process. A thorough and accurate estimate can also help you understand any unforeseen costs that may arise during the project.

As a general rule of thumb, it’s always a good idea to set aside 5-10% of your total budget for contingencies. This will help cover any unforeseen expenses that come up during the renovation, and it’s an especially important step to take if you’re doing a full bathroom remodel or substantial upgrade.

When establishing your budget for a bathroom remodel, it’s important to prioritize what’s most important to you. For example, if you’re planning on selling your home soon, it’s usually best to focus on updates that increase home value. However, if you’re staying in your home for the long haul, it can be more beneficial to focus on comfort and personalization.